
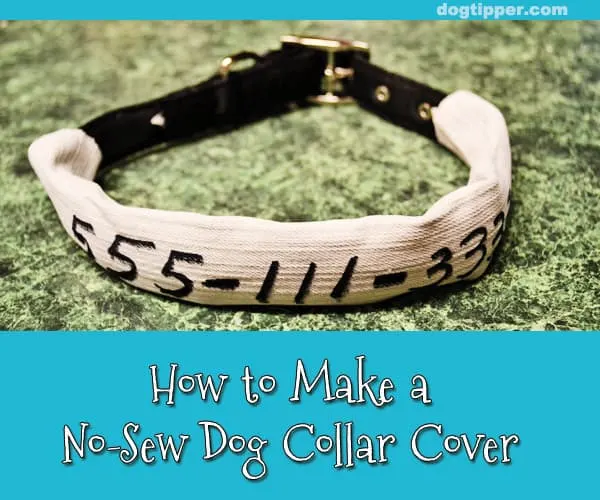
I’ve gone on record here before admitting that I don’t sew. I can, however, operate a glue gun and that’s all you need to know to make this super simple no-sew dog collar cover!

Why, you may ask, would you need a dog collar cover? Here are a few practical reasons:
- to create a large, easy-to-read ID tag for your dog that can be seen at some distance. We’ve found several lost dogs who didn’t want to allow us to get close enough to them for a while to read their ID tags.
- to make a no-jingle tag that won’t make you crazy. And I hate to think how much the jingling must bother the sensitive ears of dogs.
- to create a temporary tag, great for travel
- to make a tag that you don’t have to worry about your dog snagging and ripping off his collar.
And, of course, there are some just plain fun reasons to make a collar cover as well:
- to create a seasonal look
- to match your own clothes for vacation photos
- to dress up a dog who (like ours) will not wear clothes
It’s super simple to make these collar covers!
Step One: Gather Materials


I used a hot glue gun to create the cover because I was using fairly sturdy material (a thin denim).
If you have a polyester material that might melt, stick with fabric glue. If you’ll be writing on the collar cover, you also need a laundry pen.
Step Two: Cut the Fabric


Cut the fabric as long as the portion of the collar that’s free from buckles.
The fabric should be about three times as wide as the collar so a one-inch collar needs a strip of fabric at least three inches wide.
Step Three: Apply the Glue

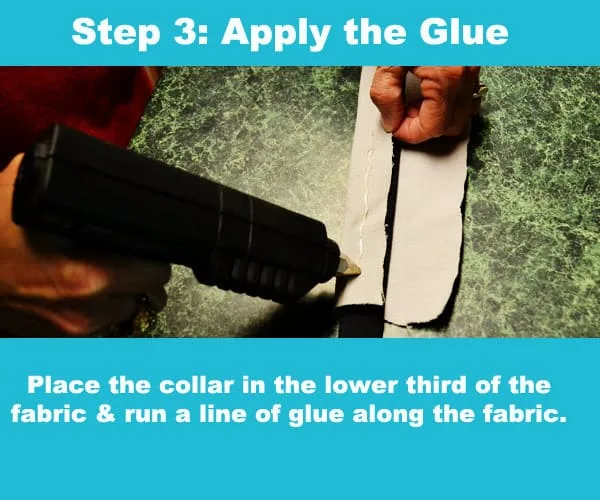
I placed the collar in the lower third of the fabric and then folded it.
Next, I ran a line of glue along the fabric.
Step Four: Fold the Material


Next, I folded the fabric on itself to create a clean edge.
Don’t make this too snug; you want to be able to easily slide the collar cover off the collar.
Step Five: Secure the Fabric

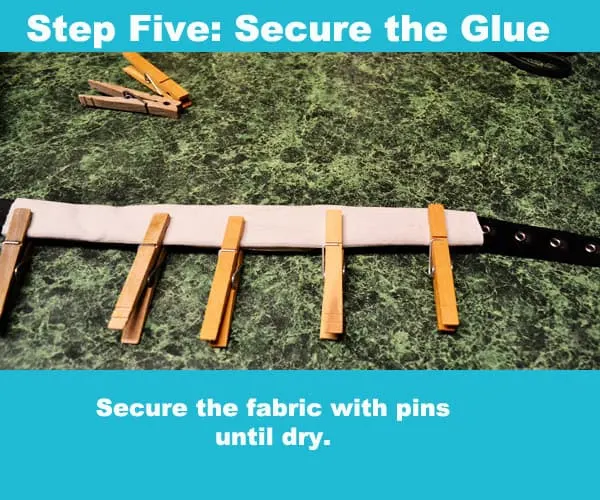
Secure the fabric with some clothespins while it dries.
Step Six: Write on the Fabric
Last step! Just use the fabric marker to write on the fabric, if you choose. (You can also do this step before the glue. I like to do it after the cover is done so you can get the exact placement of the text.)
That’s it! You’ve now got a completely custom-made dog collar cover for nothing more than a few minutes of your time!

- How to Calm a Dog During Fireworks - June 20, 2024
- Taking Your Dog to See Santa: Tips for a Jolly Visit! - December 7, 2023
- The Pug Dog Price Tag: What You Need to Know Before You Get Your Pug - September 7, 2022