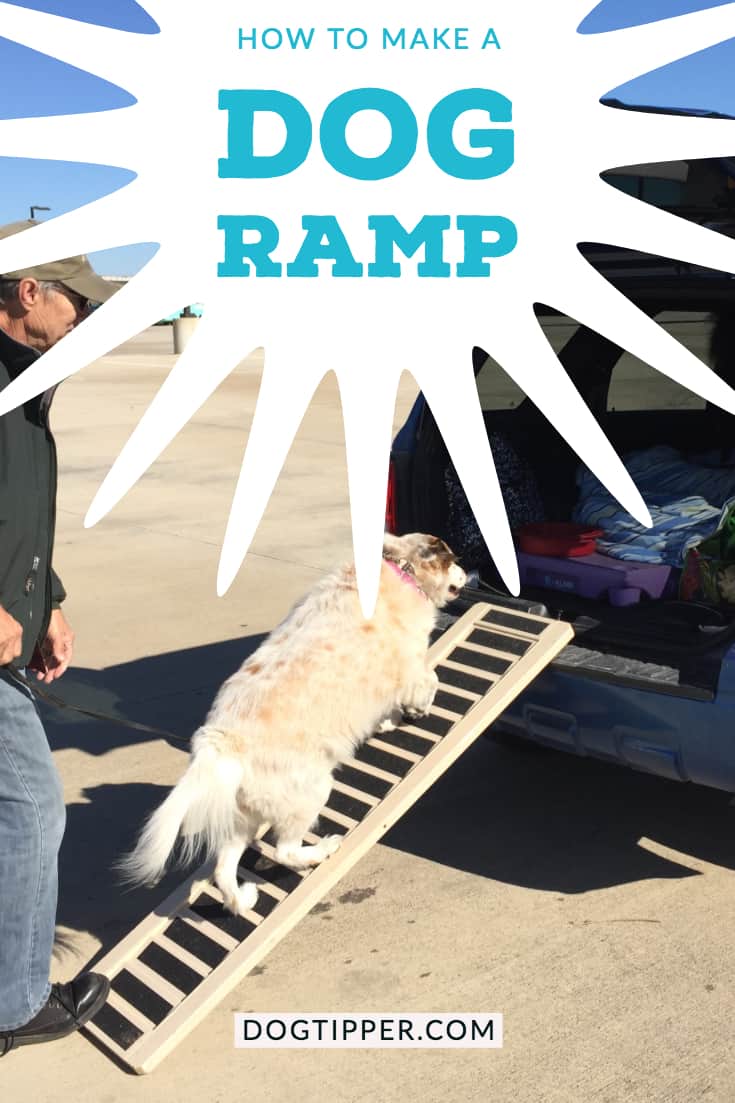
How to Make a Dog Ramp
Does your dog need a dog ramp to get in your car? Whether your dog has arthritis, is recovering from surgery or an injury, or just needs a leg up getting in your car, a dog ramp can be a great boost.
We have used an inexpensive wooden shutter to create a low-cost, lightweight dog ramp that is easy to transport even on the shortest day trip with the dogs.
This post includes affiliate links.
Note: if your dog is recovering from ACL surgery and you need a very gentle slope, this ramp should not be used. See our post on post-ACL recovery and use of a very long, gently sloping dog ramp.
Choosing a Shutter
We used a wooden shutter approximately four feet in length. You’ll find shutters in a wide variety of lengths (and widths).
The longer the shutter, the more gentle the slope into your vehicle–but take into consideration how much room you have to store the shutter in your car!
We have a Ford Escape; we keep the back seat folded down at all times for the dogs, so we have a large cargo area for our shutter, which is secured to one side with a bungee cord.
Securing the Shutter
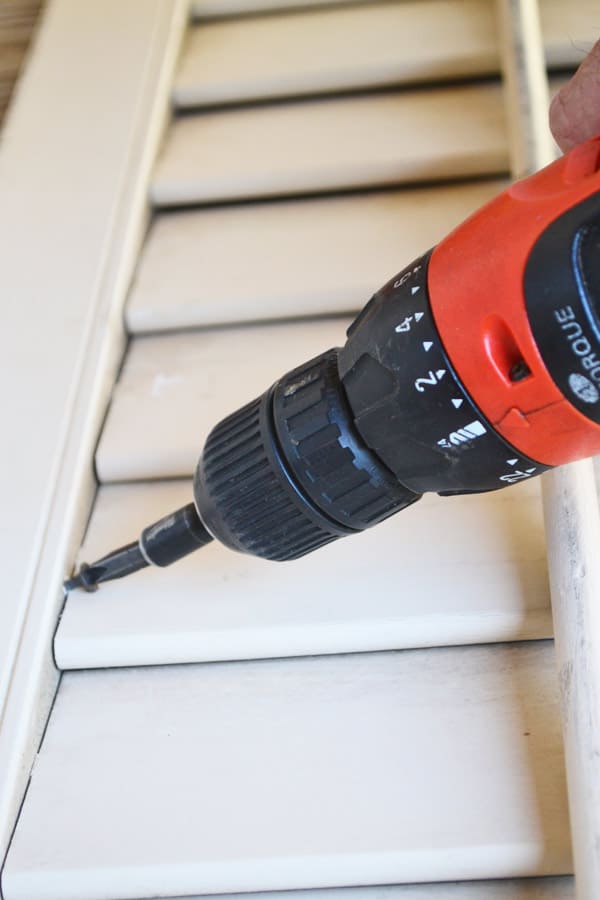
The most important part of this project is ensuring that the shutter CANNOT OPEN, even a fraction. If your shutter is a functioning shutter (not a decorative shutter), you’ll first need to completely secure the shutter so that it cannot open when your dog’s weight is placed on it.
NOTE: If you can’t get the shutter to remain closed when weight is put on any part of it, you won’t be able to use the shutter as a dog ramp.
We used one-inch screws to secure the slats, screwing into the back side of the shutter at an angle so that the head of the screw prevents the louver from moving.
You don’t need to put a screw in each slat but use at least four screws spread across the length of the shutter:
For additional security, we then screwed a flat door strike plate across the shutter’s push rod. This prevents the push rod–which controls the slats–from moving.
This strike plate is screwed into the shutter’s top or bottom rail. (If your shutter has more that one set of slats, you’ll need to do this for each shutter push rod.)
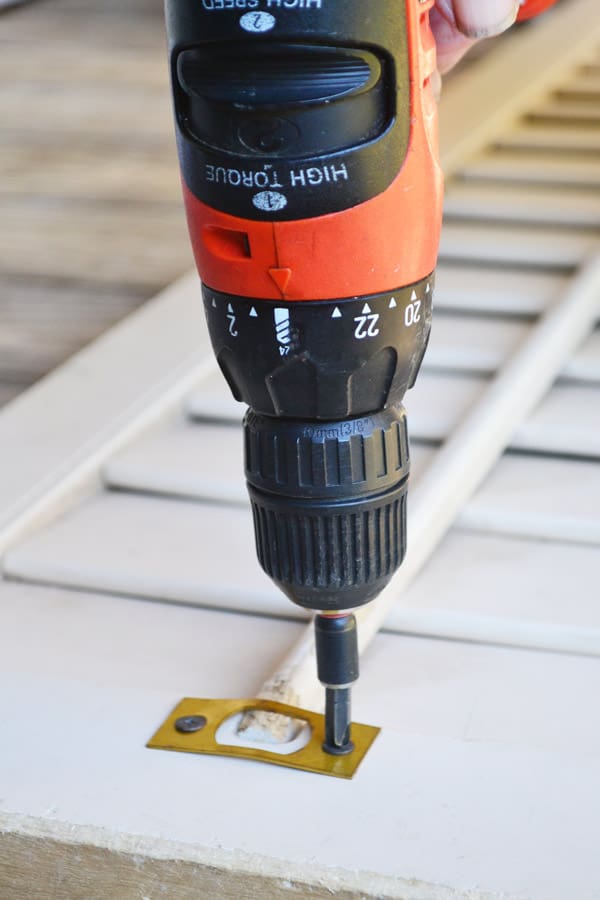
Once these steps are done, turn over the shutter and test it. Prop up the end of the shutter, with the top facing up (the screws are in the back side) and push down on the slats.
If you sense any motion in the slats, you’ll need more screws before continuing.
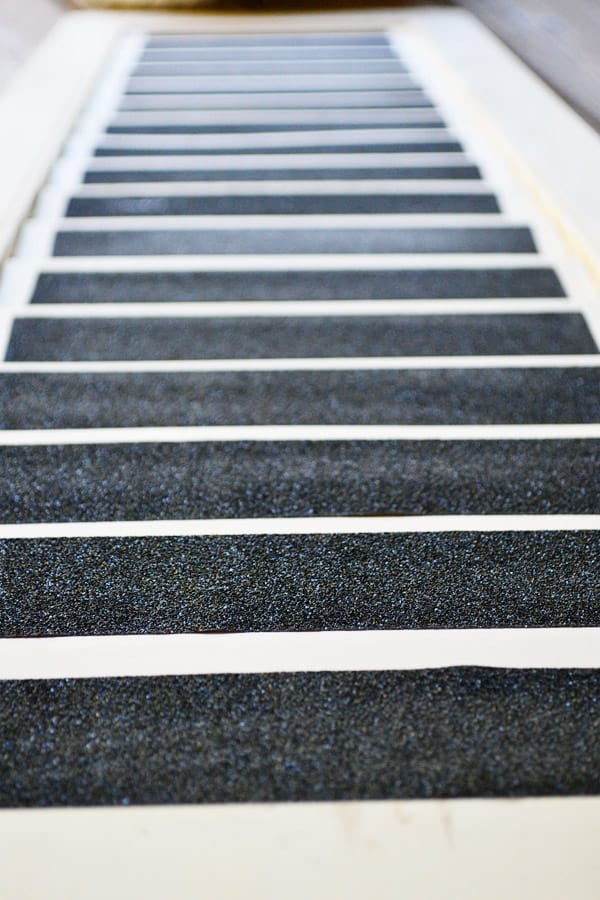
Adding Traction to the Dog Ramp
Next you’ll want to provide plenty of traction on each slat so that your dog, even when walking up the incline, feels secure.
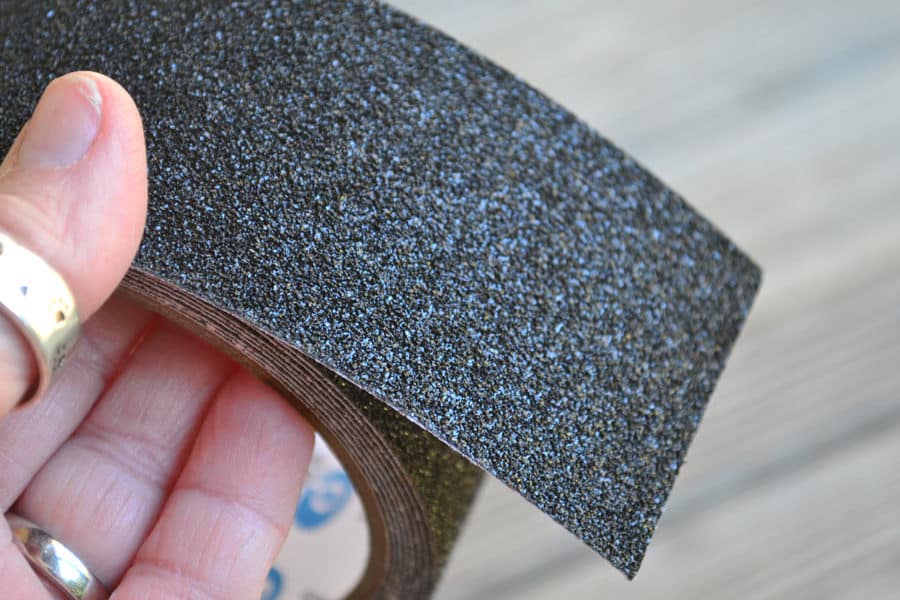
We used skateboard grip tape to provide traction to the ramp. This is the tape we used:
It’s fairly inexpensive and easy to trim to size; the top looks somewhat like sandpaper:
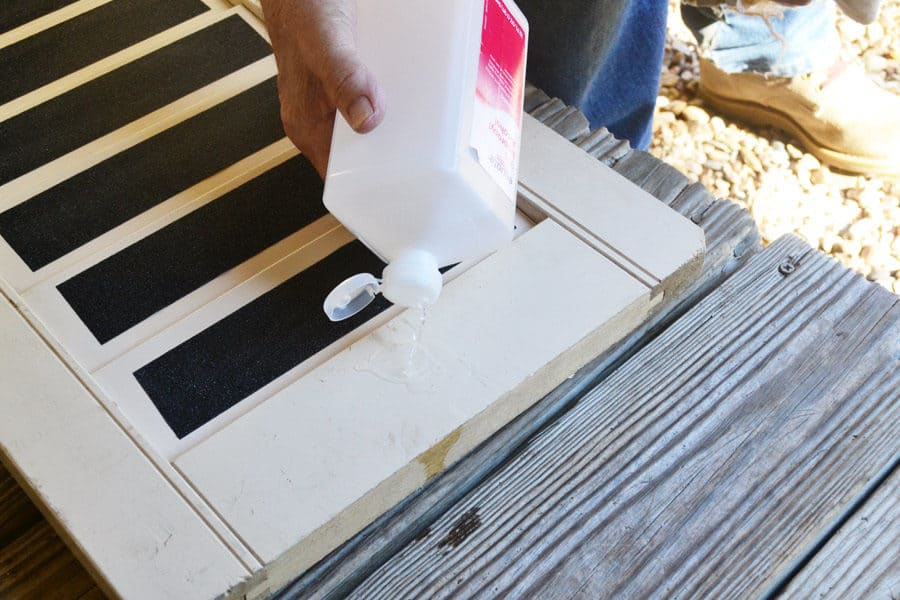
Rubbing alcohol can be used to clean each tread; allow it to dry completely before applying the tape.
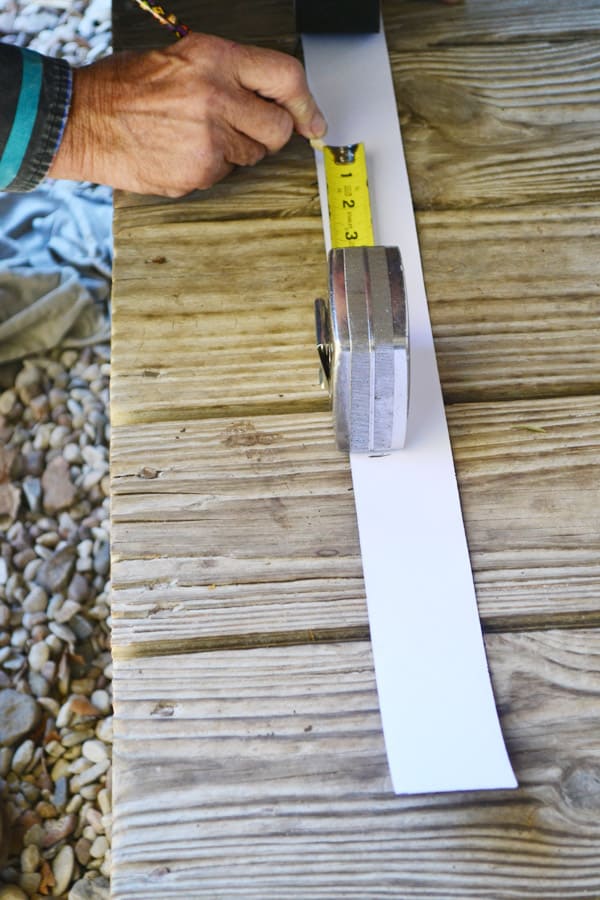
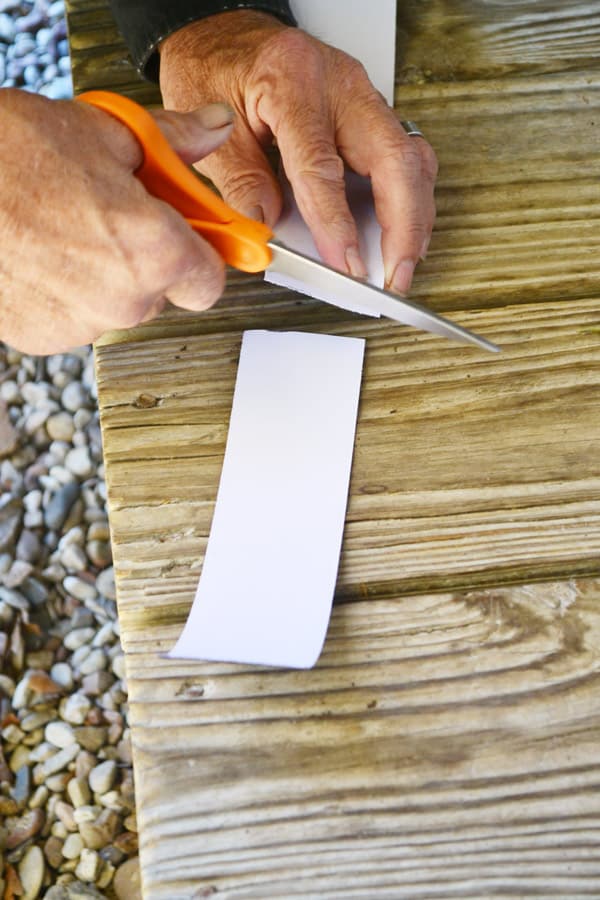
Measure your treads then mark the back of the tape…
A pair of sharp scissors can be used to cut the tape…
Peel off the backing…
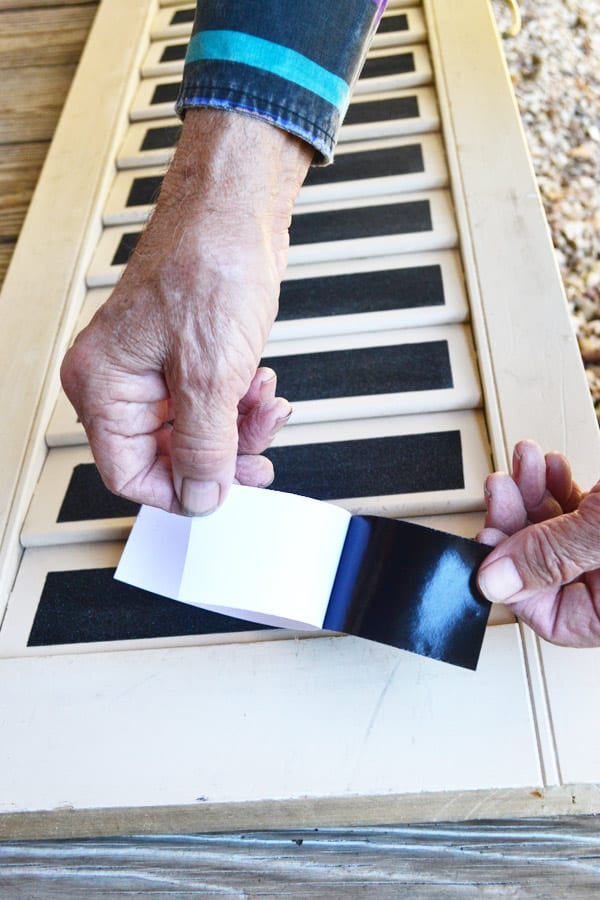
And then you’re done–one piece of tape for each slat and for the top and bottom rail:
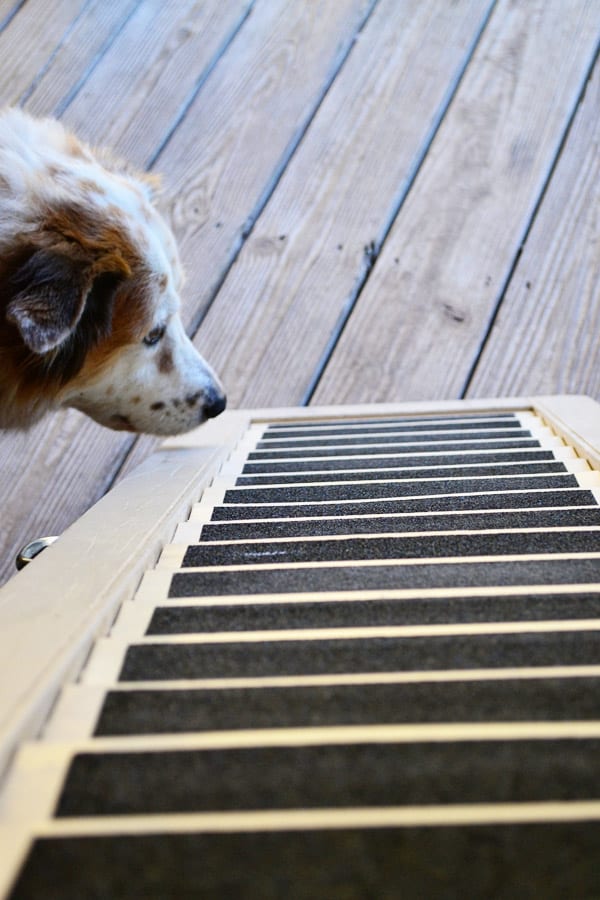
Tiki was getting curious!
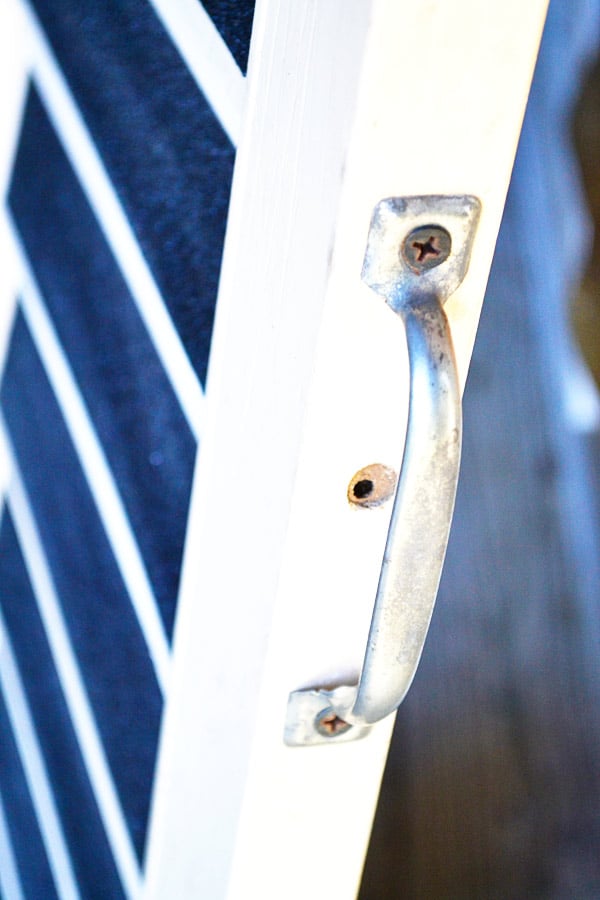
Adding a Carrying Handle
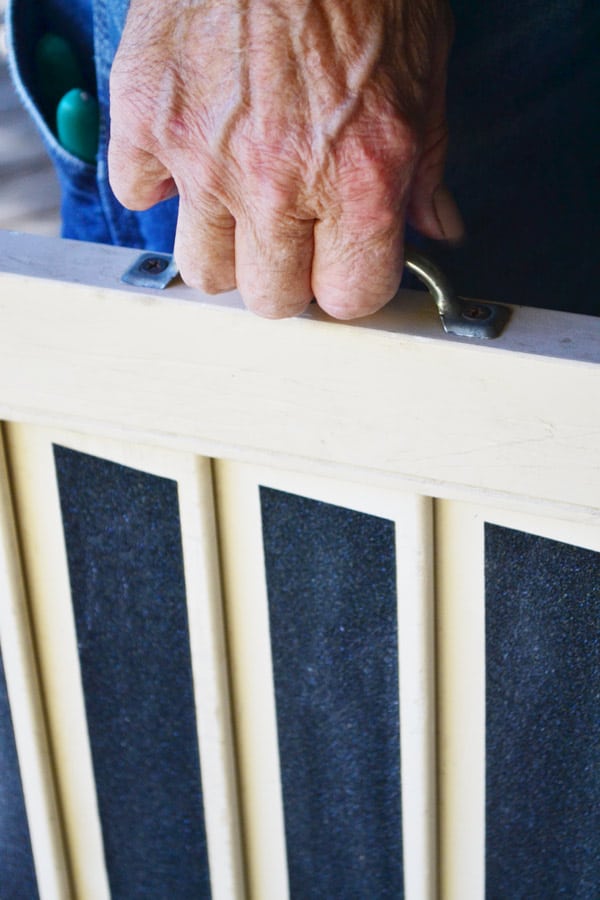
One last step we did to make the dog ramp easier to carry was adding a handle. We used an inexpensive screen door handle, screwing it onto the side of the ramp halfway down:
The handle make it much easier to carry the ramp and move it into position…
Using the Dog Ramp
The ramp is easy to put in place; once we have it propped against the bumper of the car, one of us places a foot on the bottom of the shutter for added stability before letting Tiki start up the ramp. (If your dog is reluctant to go up or down a ramp, don’t miss our post on how to train your dog to use a dog ramp.)
Having an easy to carry ramp has been great for Tiki who struggles with arthritis; after years of happily jumping into the car, she’s now happily cruising up her ramp!

- Shakespeare Dog Names: 200+ Literary Names from the Bard - February 20, 2026
- Make a DIY Snuffle Box - February 18, 2026
- Review: Outward Hound Hide ‘n Slide by Nina Ottosson - February 15, 2026